There is SO MUCH online information on how to add S3 bucket and get your keys, it will make you head swim. After doing a search for this information and finding so many different ways, we decided to write up this post so even the kids could understand:)
In our instance, we are creating a software which needs ability to upload files to our S3 bucket. Then allow these files to be displayed in a generated web page. The users of the software need to add their own Amazon S3 bucket and use their own access and secret keys.
Since the AWS information is contained on users computer and not online, security is not an issue. We encourage you to review the official AWS documentation as this tutorial is for education use only.
IMPORTANT NOTE: We are setting “public” permissions for our Amazon S3 Bucket and according to some is dangerous. What we present here works for us. We take or assume no liability in associated use of this educational tutorial. If you are unsure, seek professional assistance in creating your bucket permissions.
Let’s get started creating your S3 bucket, then we will move on to creating a user and assign their keys…
Creating Bucket with Public Access
Step 1
Login to your Amazon Web Services (AWS) console – https://console.aws.amazon.com/console/home
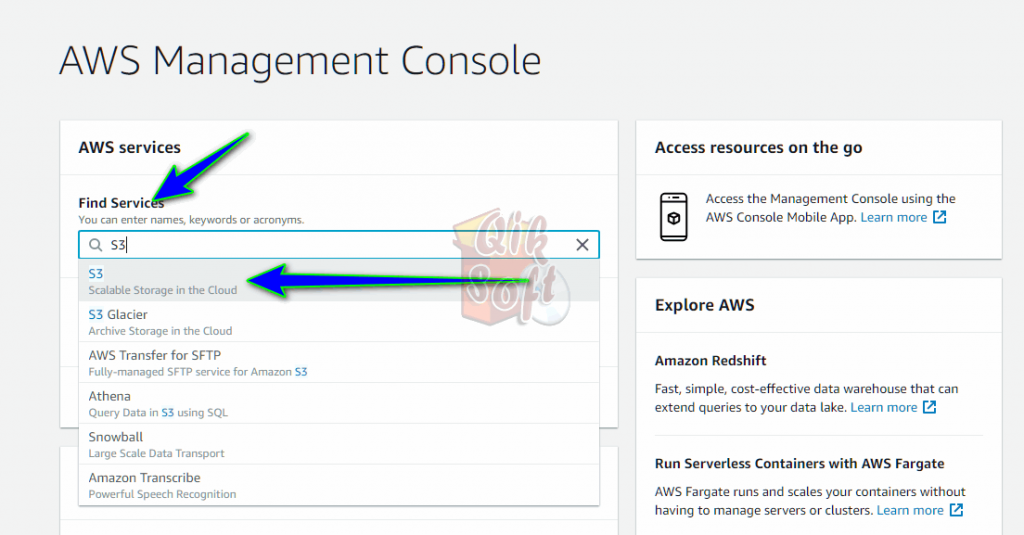
Once logged in, search for “S3” and click on “S3 Scalable Storage in the Cloud” (shown in the below image) to open your Amazon S3 console.
Step 2
Click the “Create Bucket” button to create your new bucket.

Enter your bucket name, keeping in mind of the restrictions. We keep it simple with something like “my-bucket-name”.
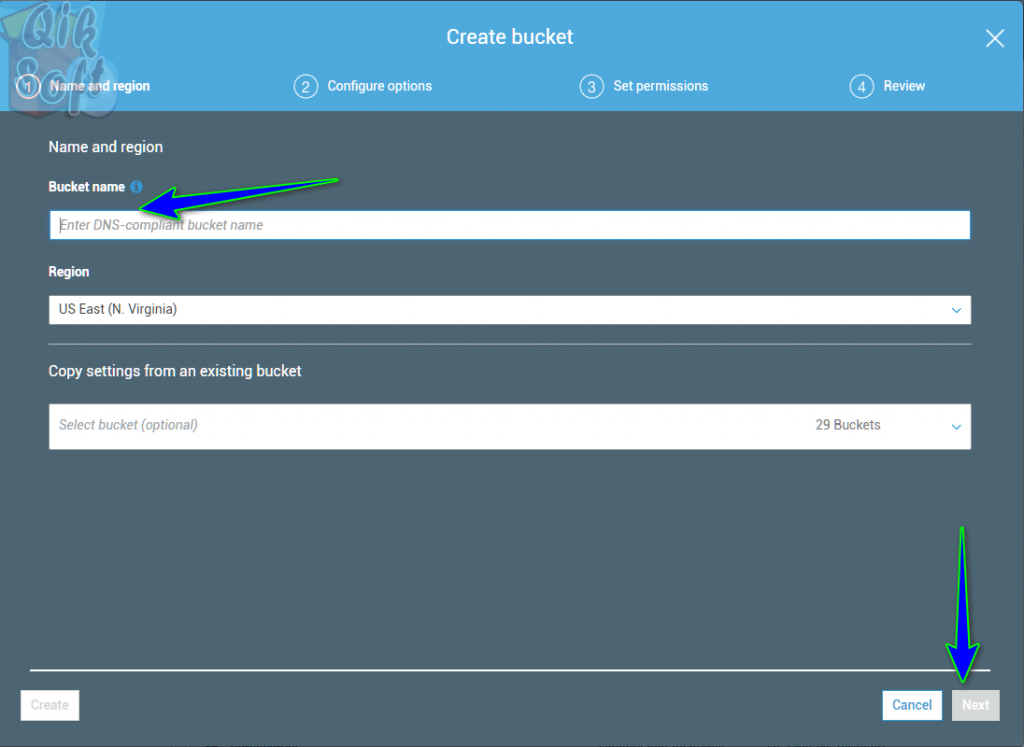
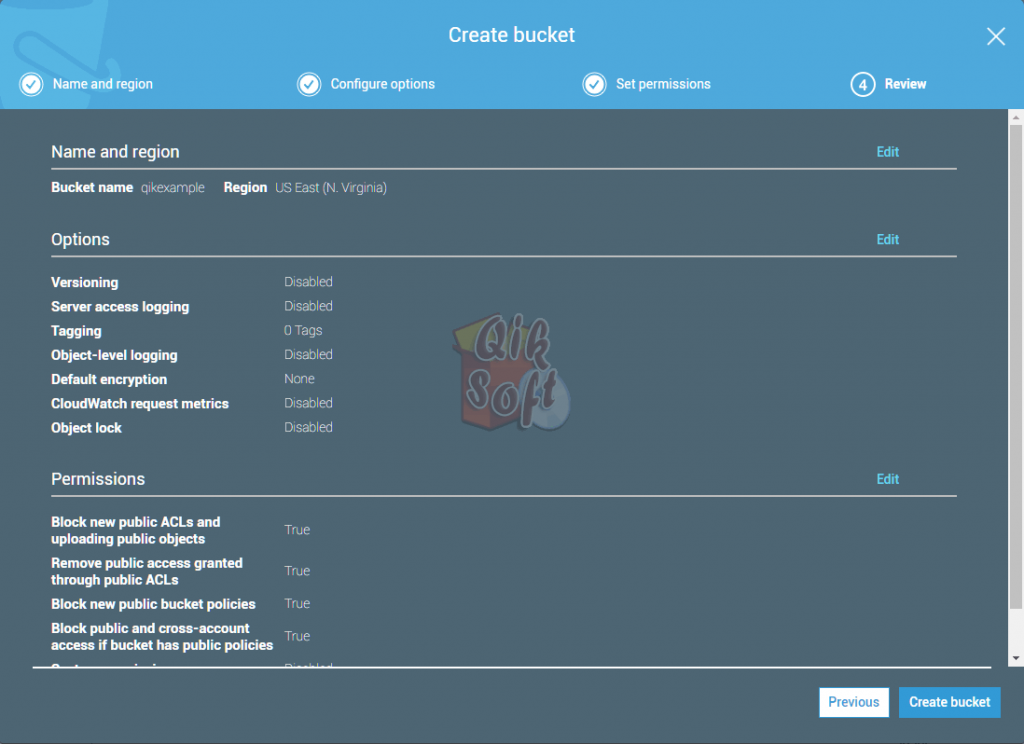
If you bucket name is correctly entered (or not taken by another user), you will see
Step 3
Setting Public Permissions
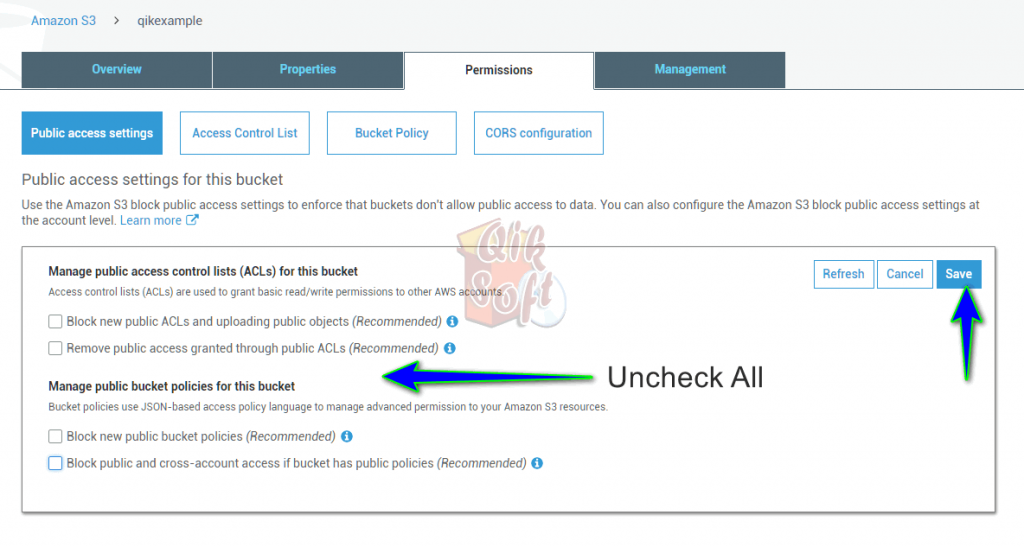
Again, as we mentioned above: this step is setting your bucket to “public access”. What this means is anyone can see the contents of the bucket. This is the only way we have found which allows images files to be served on a web page (or for that matter, allow our app to upload / list images).
In the list of your Amazon buckets, locate the one created above and click on it

Then click on the “Permissions” tab and uncheck all as shown below
Once saved, you will see
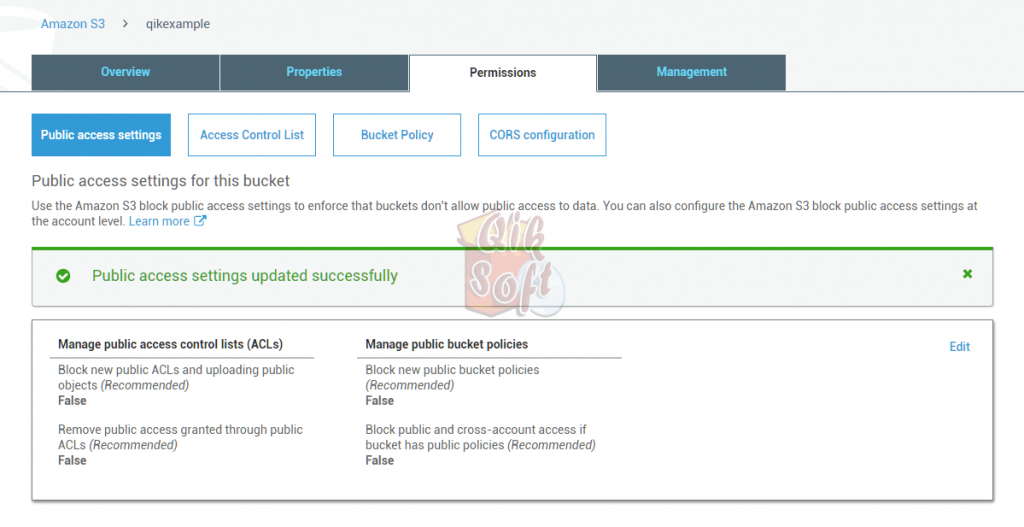
You have added your bucket and allowed public read access to it. If it is any peace of mind, no one can upload anything to the bucket without your S3 access and secret keys. We will now show you how to create a user (or assign a user to new bucket) and their keys in Part 2 of this tutorial.
If this tutorial has helped you and wish to reward us, how about giving us a “one-time allowance” on Amazon? We will use the allowance to buy supplies which fuels future software development and of course, more tutorials like this one! Amount does not matter and all are appreciated. CLICK HERE to Learn More…
Now we need to add a user, assign a policy and generate access keys.


