In the first part of this tutorial we covered adding a Amazon bucket with public permissions. This is used to serve files (images in our case) to a web page. If you arrived here and need to review adding your bucket, click here.
There must be a ga-zillion tutorials on the subject of adding an Amazon bucket and getting your access + security keys. When we fist wanted to learn about the subject and did a search – oh my! So much un-needed, unclear and misinformation our little heads nearly exploded! So here is our take and we have attempted to make it simple in this step by step tutorial.
IMPORTANT NOTE: We take or assume no liability in associated use of this educational tutorial. If you are unsure, seek professional assistance in creating your bucket permissions and setting up keys. What works for us may not fit your needs.
Let’s get keys for the S3 bucket created in part one.
Creating Amazon S3 Keys
Step 1
If you are already logged into AWS, skip to Step 2, otherwise login to your Amazon Web Services (AWS) console – https://console.aws.amazon.com/console/home
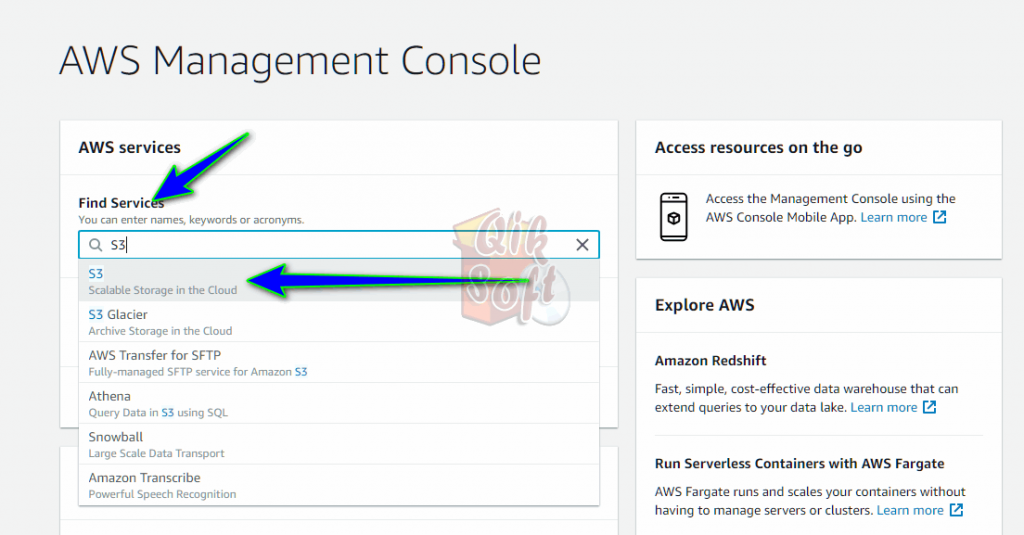
Once logged in, search for “S3” and click on “S3 Scalable Storage in the Cloud” (shown in the below image) to open your Amazon S3 console.
Step 2
Click on your username which is located in top right corner of the page. Click on “Security Credentials” in the drop-down.

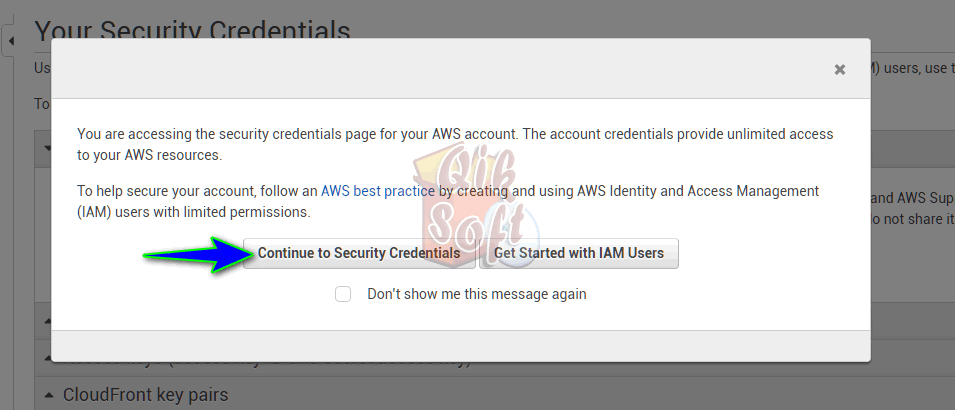
Most likely you will be presented with a popup like below, simply dismiss
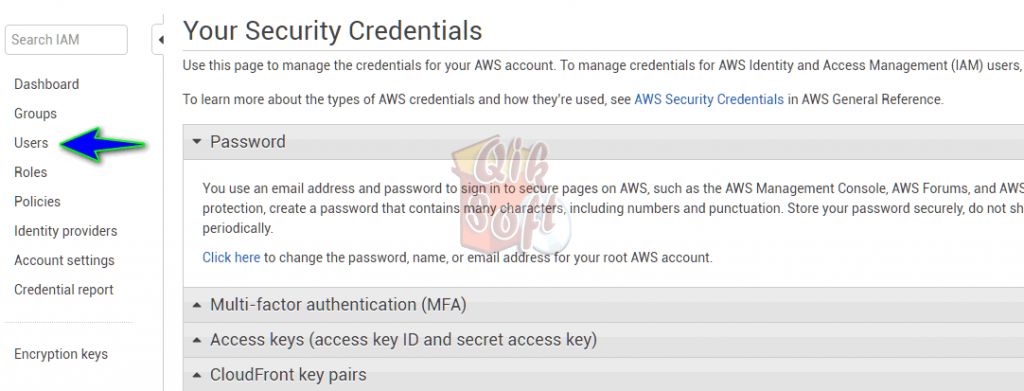
Now click on “Users” in the left menu
Step 3
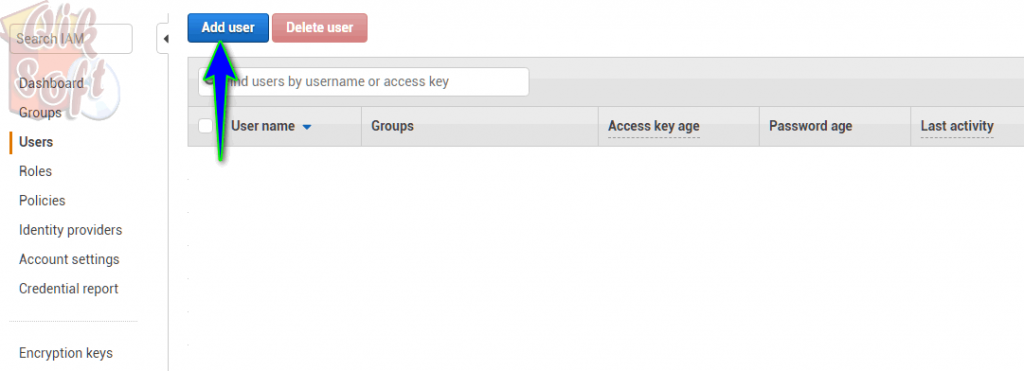
Create a new user (or use an existing one covered below). To create a new user, click on the blue “Add User” button
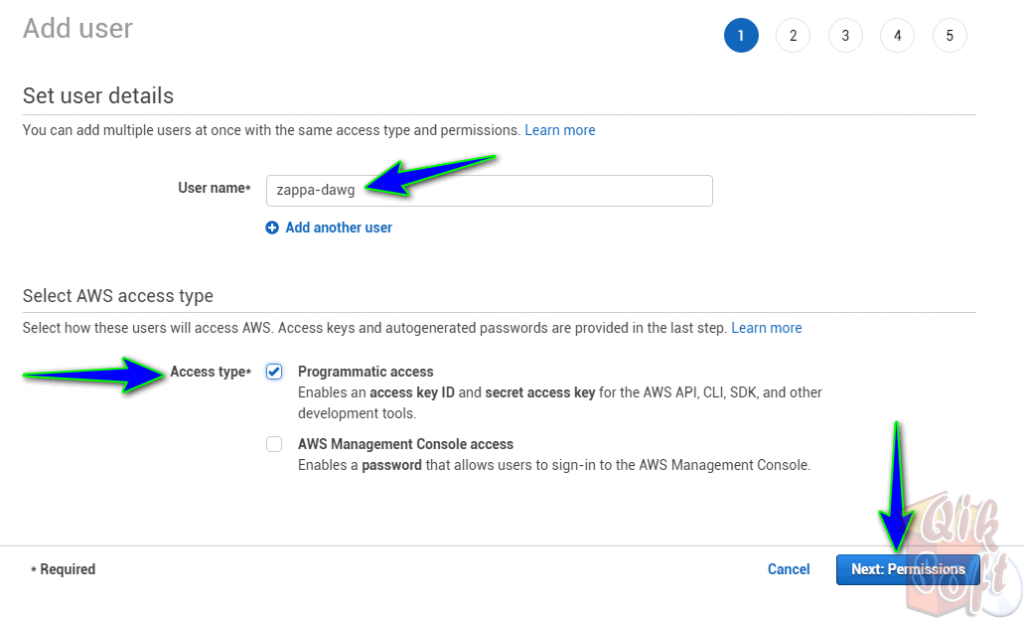
Enter your desired User name, keeping in mind Amazon has naming rules and many special characters cannot be used…
Choose the access types as “Programmatic access”. Click the “Next: Permissions” button
Now we need to assign a policy. You can use existing policy but we are creating a totally new one. We choose the following
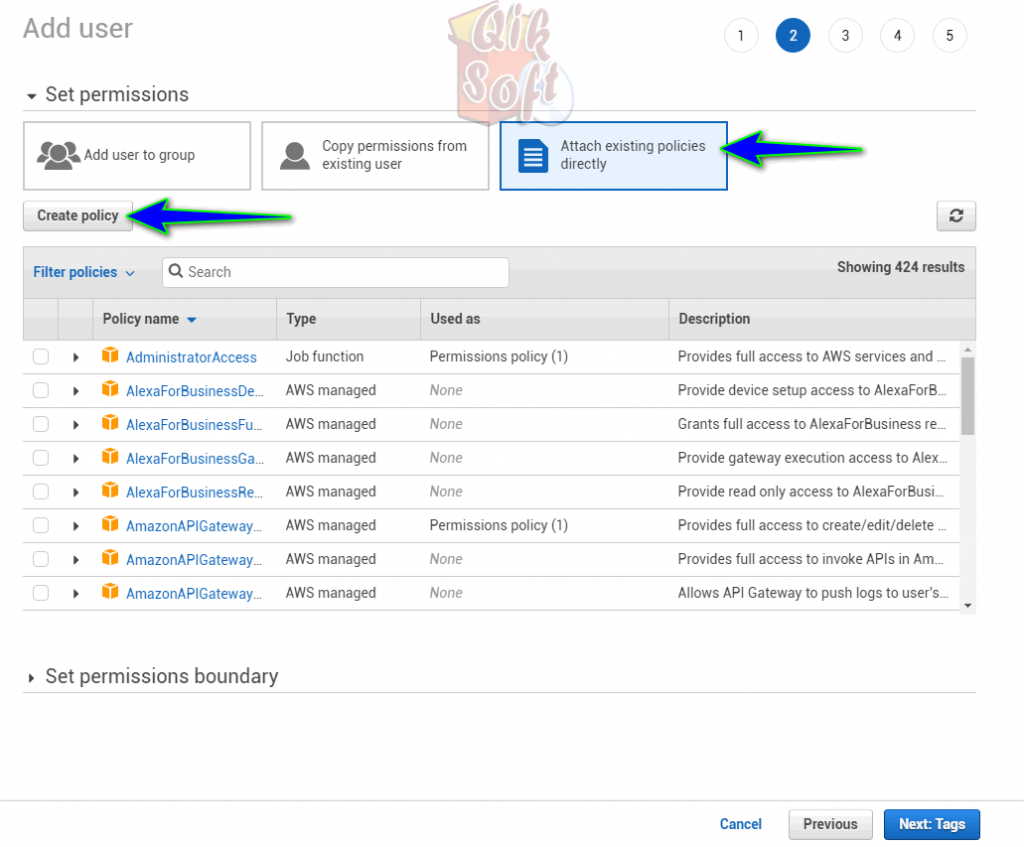
After clicking “Next: Tags” we will have a new tab / window open.
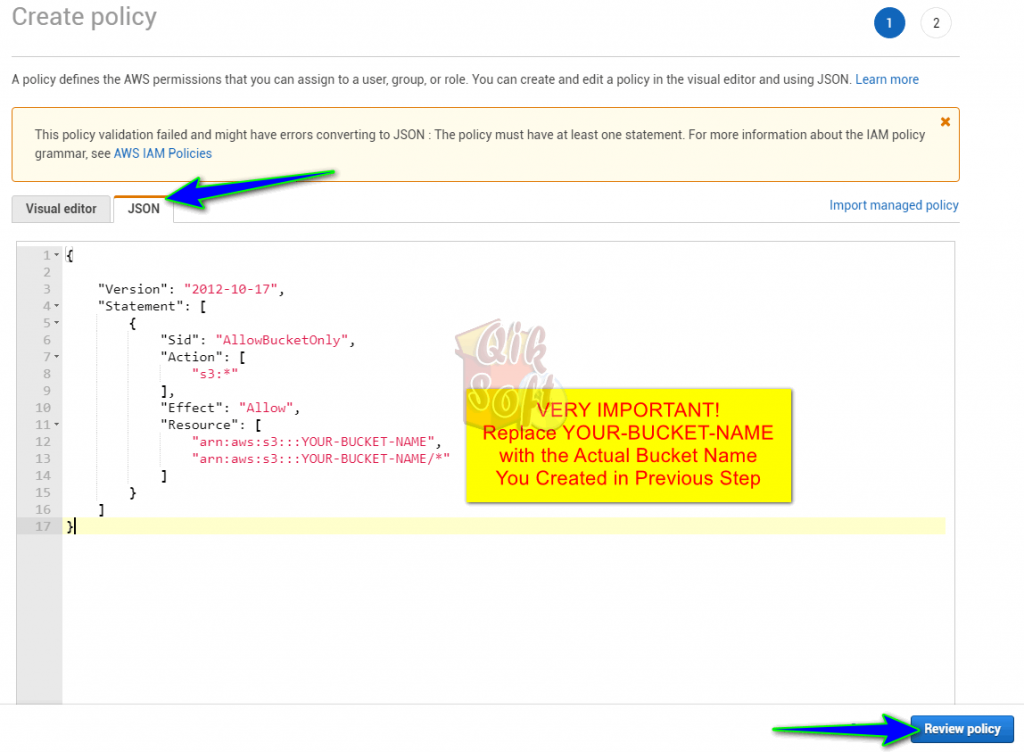
In the new tab / window, click the “JSON” tab and enter the code below (copy and paste for ease of use)
{

    "Version": "2012-10-17",
    "Statement": [
        {
            "Sid": "AllowBucketOnly",
            "Action": [
                "s3:*"
            ],
            "Effect": "Allow",
            "Resource": [
                "arn:aws:s3:::YOUR-BUCKET-NAME",
                "arn:aws:s3:::YOUR-BUCKET-NAME/*"
            ]
        }
    ]
}
Take special care to copy ALL of the content! Also note you should change the “YOUR-BUCKET-NAME” to your bucket name.
Now assign a name for your policy
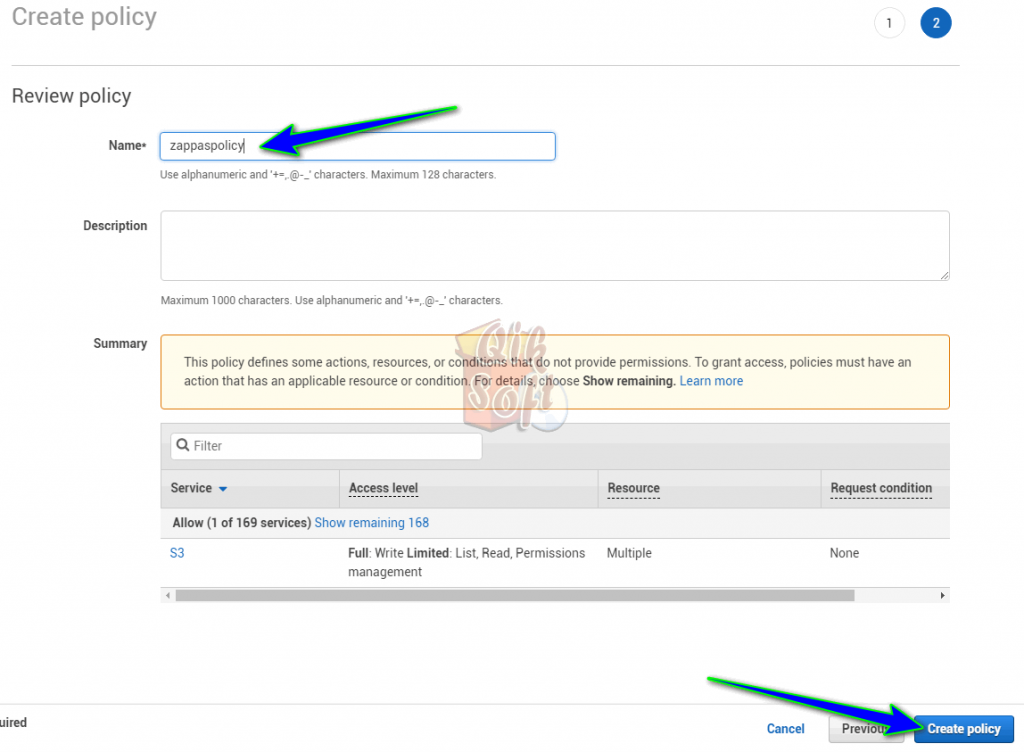
Once you have successful confirmation the policy was built, close the current tab and return to the tab where we have been creating the new user.
Step 4
Not really a new step, but we need to make sure you closed the tab after creating the policy and returned to the working tab..,.
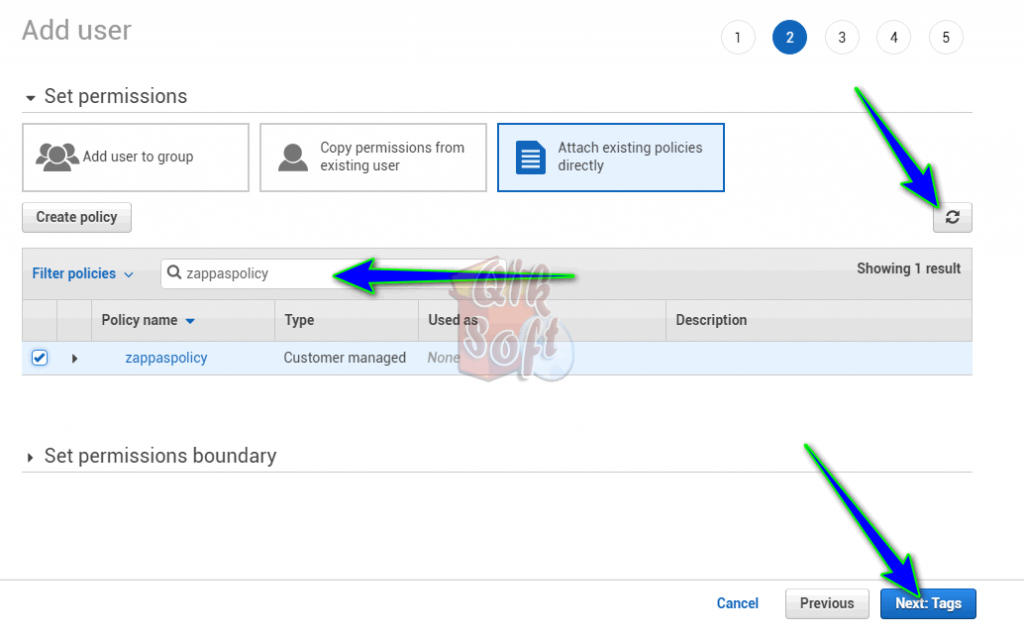
Click on (if not already highlighted) “Attach existing policies directly” and then the “refresh icon”. In the “Filter policies” field type in policy name you created and tick the box beside it
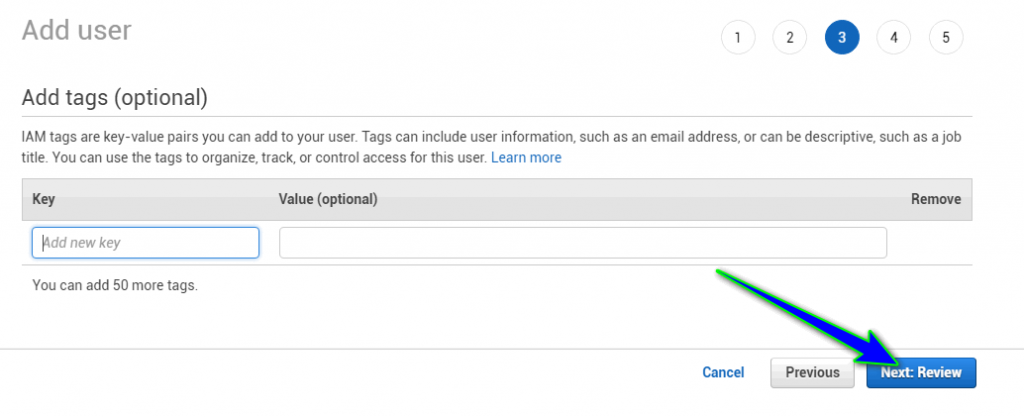
 Click Next: Review
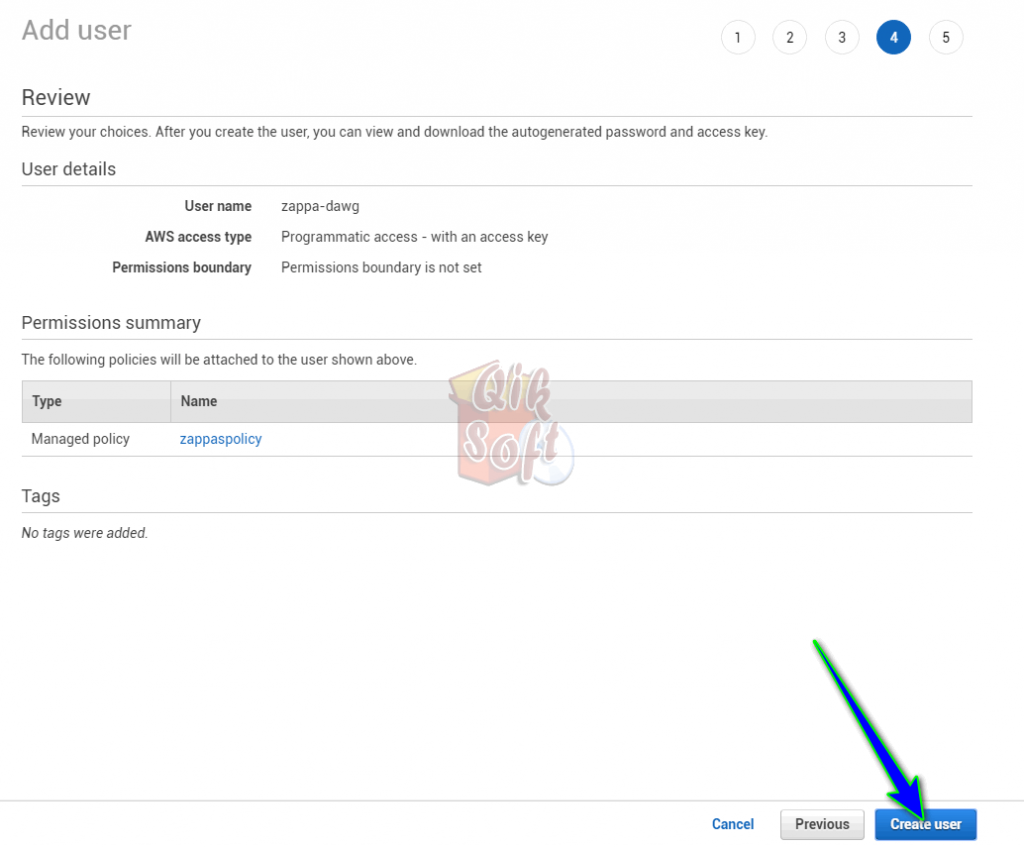
Then click Create user button
Now you can find the Access and Secret Key
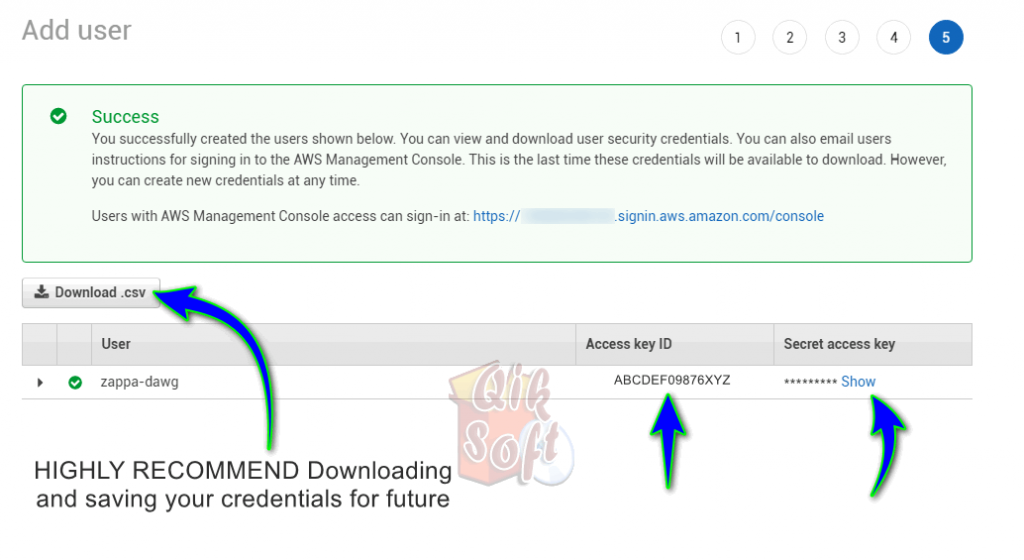
IMPORTANT NOTE: This is you one and ONLY chance to save your access and secret keys. If you do not, there is no way to obtain the SECRET KEY at a later date. You can of course create a new one at any time.
Also, remember that if you are setting up a bucket to server images via your web page or app you need to set the bucket to public!
If this tutorial has helped you and wish to reward us, how about giving us a “one-time allowance” on Amazon? We will use the allowance to buy supplies which fuels future software development and of course, more tutorials like this one! Amount does not matter and all are appreciated. CLICK HERE to Learn More…
If you missed part 1 where we create a bucket with public permissions…


